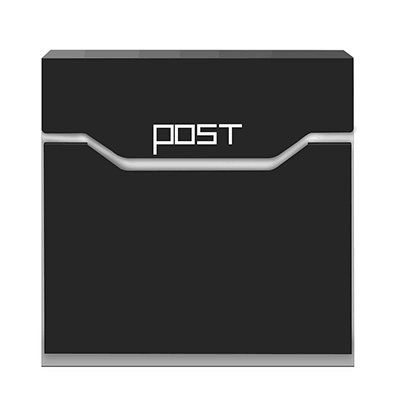
You need to choose the best installation location for your mailbox so that your postman can effectively deliver your package. You also need to assemble and install the wall-mounted mailbox correctly, and you need to consider the type of wall-mounted mailbox you want.
Fortunately, the process of installing a wall-mounted mailbox requires only eight simple steps. You can easily install your mailbox in one afternoon without much difficulty. However, before you start, you should check the manufacturer's instructions or check the guide on the product website for installation tips for specific models to ensure proper connection.
Prepare to install wall-mounted mailbox
As long as you install it correctly, your wall-mounted mailbox will look great and can be used for several years. Before you start drilling and hanging the mailbox, please take a moment to gather your materials and tools, and most importantly, obtain the formal consent of the local postmaster.
Material
Unlike email posts, you don’t need to worry about digging holes, pouring concrete, or any other labor-intensive tasks. Wall-mounted mailboxes sometimes even come with all the materials needed for the hanging device, saving you time in the store.
In other words, errors will occur. Compare your email plan or website information to learn more about the type and quantity of materials provided, and make sure your kit contains:
Mounting hardware, such as mounting brackets or support beams
Screws, fasteners or bolts
Your wall-mounted mailbox
Check each piece before you start checking for dents, scratches, warped parts, or missing hardware.
tool
After checking the materials, it's time to collect the tools. You need to place the tool near the mailbox installation site for easy access.
To get started, you need:
drill
Masonry or rock drill bit, if you want to drill into a brick or concrete wall
grade
tape measure
Chalk, pencil or marker
In other words, some people prefer to leave the mailbox installation to professionals. Contact the contractor or mailbox expert for guidance and easy installation without worrying about complicated instructions.
Measuring height
The wall-mounted mailbox is a quick office or home renovation project that can immediately increase your appeal. Although you should place your mailbox for easy access, you should also consider your postman before installing a wall-mounted mailbox.
Measure the height of the mailbox before drilling to ensure that both you and your mail delivery staff can reach it. For example, if you plan to install the mailbox on the porch near the front door of the office, consider any stairs, decorative plants, statues, or furniture. You may walk out of the building to retrieve the mail, but your postman will approach the mailbox from the opposite side.
Choose a reasonable height for your mailbox, leaving space between your door and any windows around it. In general, your goal should be to set a 41"-45" mailbox height above the porch, sidewalk, or road surface to meet the length requirements after installation.
Mark the wall
After measuring height:
Place the wall-mounted mailbox against the wall.
Adjust its position as needed.
After determining the ideal location, mark the location of each mounting hole to guide your drill.
Use your spirit level to make sure that the top of the mailbox is not skewed.
·
Drill hole
Put your mailbox aside and pick up your drill. Installing most wall-mounted mailboxes does not require deep drilling into the wall, but please check the mailbox installation guide first.
Place the drill bit on the mark made in the previous step, and then slowly start drilling for the screw.
Install hardware safely
Your wall-mounted mailbox may come with the tools needed to hang it in your home or company. However, in some cases, you may need to purchase some tools and hardware from a local store.
Please check your mailbox installation instructions before purchasing brackets, brackets, screws or other things to complete your project. The siding (such as vinyl, concrete, or brick) of your home or office building will determine the necessary tools.
After fixing the correct parts, follow the manufacturer's guidelines to connect them to the wall.
Hanging wall-mounted mailbox
After hanging up the installation parts, it's time for the last step. Drill a screw in each bracket hole. Screw in only the tip of the screw to ensure that the top, sides, and bottom of the mailbox are level.
After checking whether the mailbox is level, complete the screw drilling. If something prevents your mailbox from being flush with the wall, you may need to loosen the screws and remove debris from the installation location.
If you have not ordered a custom wall-mounted mailbox, you can complete the installation and add the house number, your street address or your desired name at the bottom of the mailbox. You will improve your home or business while allowing your postman to easily find your address.

